
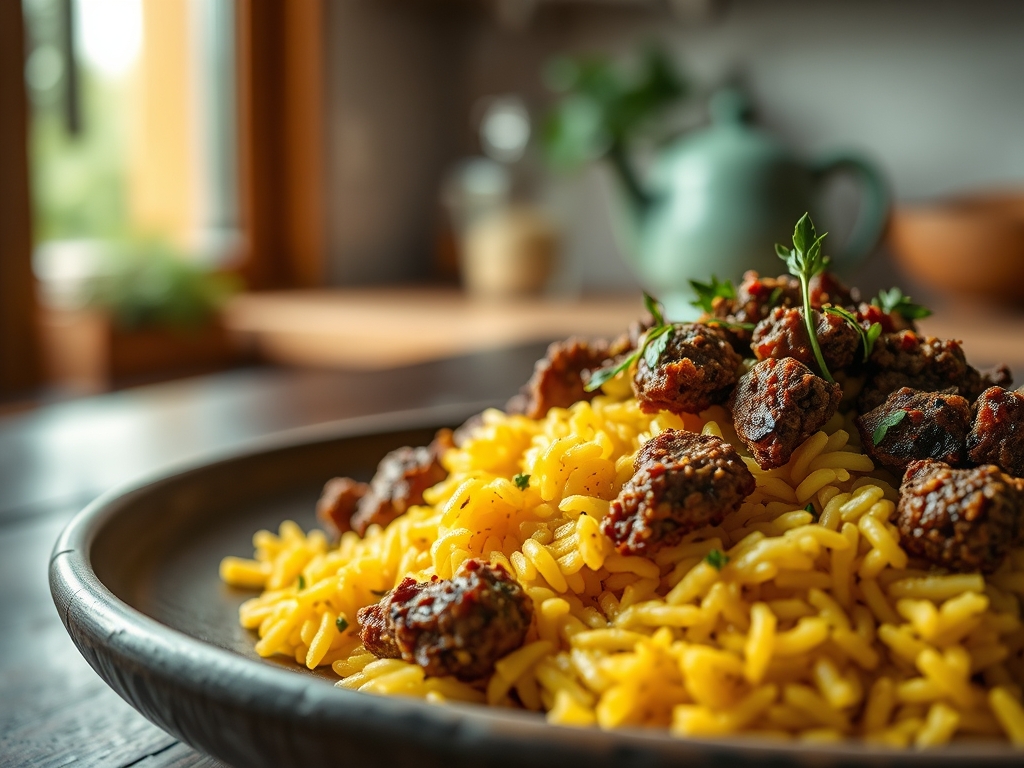
Picture the sizzle of fat hitting a heavy-bottomed skillet; it is the sound of a weeknight rescue mission. When you are craving comfort that hits the palate with a vibrant, citrusy punch, yellow rice and ground beef recipes are your absolute gold standard for efficiency and flavor. We are talking about fluffy grains stained with turmeric and savory, browned protein that creates a meal both visually stunning and deeply satisfying.
This is not just a dump and stir situation. It is a study in texture and aromatic layering. The goal is to achieve a perfect pilaf style rice where every grain remains distinct, coated in the rendered essence of high quality beef. We are moving beyond the basic box mix to embrace a world of spices that wake up your taste buds. Whether you are feeding a hungry family or prepping for a high performance week, these skillets offer a nutritional balance of complex carbohydrates and bioavailable iron. Let us dive into the chemistry of the perfect sear and the physics of the fluff.
The Gathers:
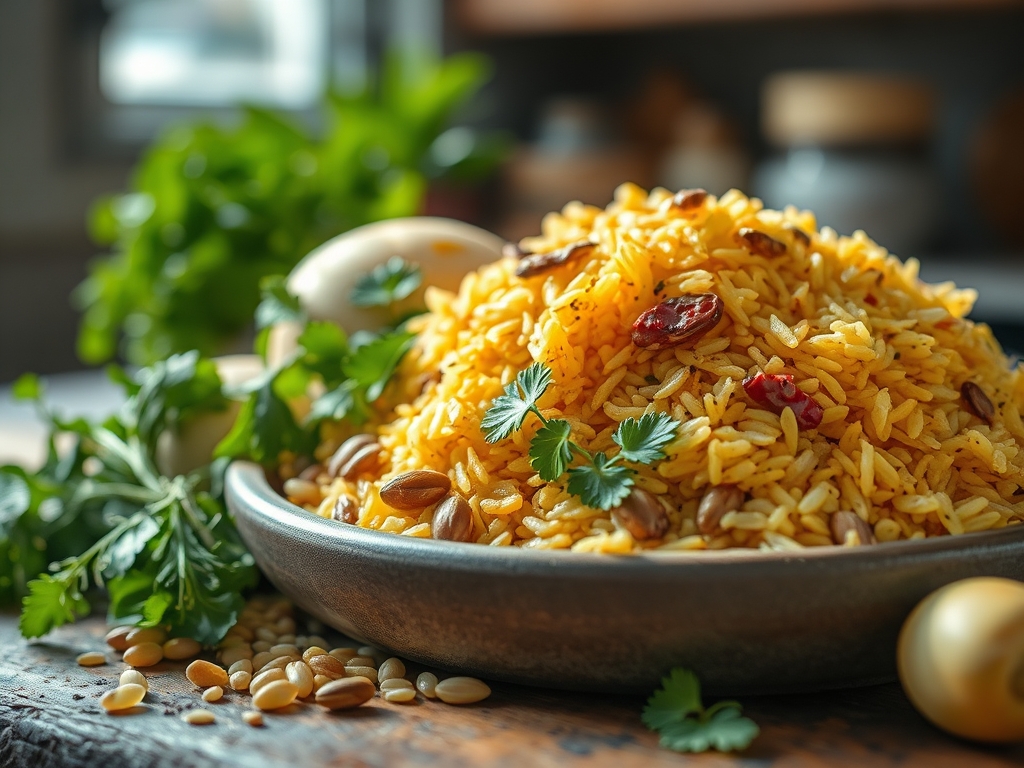
To master these yellow rice and ground beef recipes, your mise en place must be precise. Start with one pound of lean ground beef; ideally a 90/10 ratio to minimize excess grease while maintaining a succulent mouthfeel. For the rice, long grain jasmine or basmati is essential because their lower amylopectin content prevents the grains from becoming a gummy mass. You will need a high quality turmeric or saffron threads for that iconic golden hue.
Gather your aromatics: one large yellow onion, three cloves of garlic, and a red bell pepper for a piquant sweetness. For the liquid gold, use a low sodium beef bone broth to infuse the rice with collagen and depth. Do not forget the fats; a tablespoon of grass fed butter or avocado oil helps to toast the rice grains before boiling.
Smart Substitutions: If you are looking for a leaner profile, ground turkey or bison works beautifully. For a low carb twist, use riced cauliflower, though you will need to reduce the liquid volume by seventy percent. If you lack fresh turmeric, a pinch of yellow curry powder adds a complex, earthy warmth that mimics the traditional profile perfectly. Use a microplane to zest a lime at the end; the citric acid cuts through the richness of the beef fat.
The Clock
Efficiency in the kitchen is all about the Chef's Flow. Your total active prep time is approximately fifteen minutes, with a cook time of twenty five minutes. The secret is overlapping tasks. While your heavy-bottomed skillet preheats, use a bench scraper to organize your chopped aromatics.
The first ten minutes are dedicated to the Maillard reaction; browning the beef and softening the vegetables. The final fifteen minutes are passive, as the rice absorbs the broth under a tight-fitting lid. Respect the rest period; allowing the skillet to sit off the heat for five minutes after cooking ensures the moisture redistributes evenly through the grain.
The Masterclass
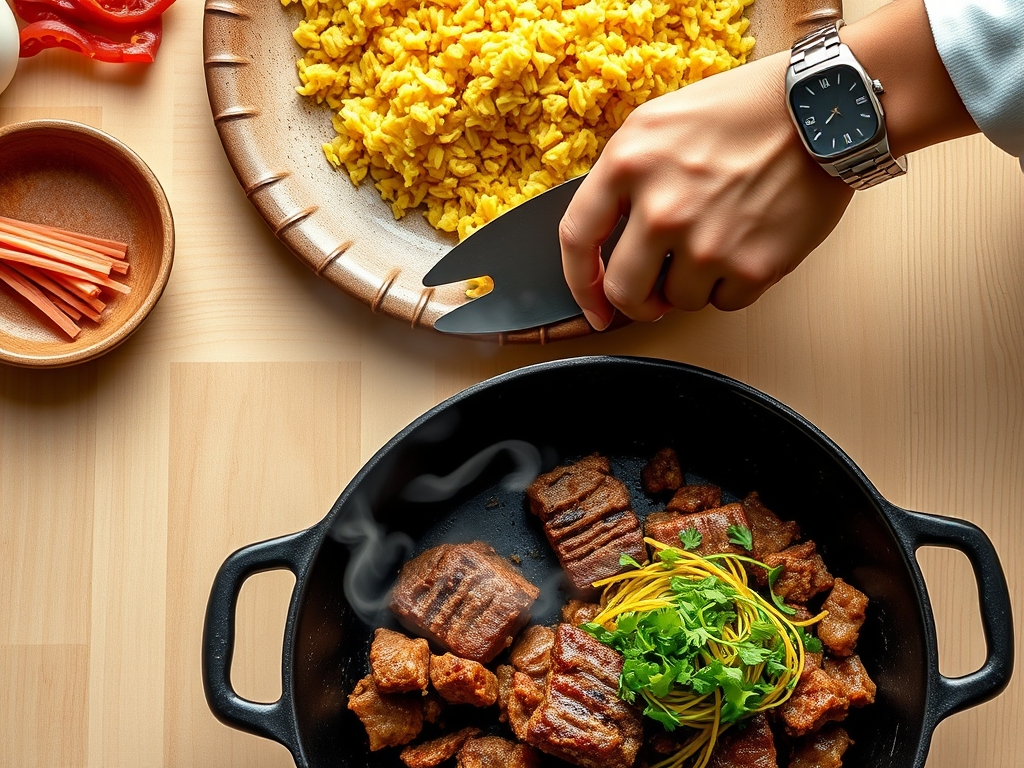
1. The Maillard Foundation
Place your ground beef into a preheated skillet over medium high heat. Use a stiff spatula or a meat masher to break the protein into small, uniform crumbles. Do not stir constantly; let the meat sit undisturbed for three minutes to develop a deep, mahogany crust.
Pro Tip: This is enzymatic browning at its finest. The Maillard reaction occurs between amino acids and reducing sugars, creating hundreds of different flavor compounds that boiled meat simply cannot replicate.
2. Sautéing the Aromatics
Once the beef is browned, push it to the perimeter of the pan. Add your diced onions and peppers to the center, utilizing the rendered beef fat to soften them. Sauté until the onions are translucent and slightly caramelized.
Pro Tip: Onions contain sulfur compounds that mellow and sweeten when heated. This process, known as pyrolysis, transforms the sharp bite of raw onion into a savory base note for the rice.
3. Toasting the Grains
Add your dry rice directly into the skillet with the meat and vegetables. Stir for two minutes until the edges of the rice grains appear translucent and you smell a nutty aroma. Add your turmeric, cumin, and garlic powder now.
Pro Tip: Toasting the rice coats the exterior starch in fat. This physical barrier prevents the grains from bursting and releasing excess starch into the liquid, ensuring a fluffy, non-sticky result.
4. The Deglaze and Simmer
Pour in your beef broth and use your spatula to scrape up any browned bits stuck to the bottom of the pan. Bring the liquid to a rolling boil, then immediately drop the heat to the lowest setting and cover with a lid.
Pro Tip: Deglazing captures the fond; the concentrated flavor particles stuck to the pan. This ensures that every ounce of savory goodness is absorbed back into the rice grains.
5. The Steam and Rest
Simmer for fifteen minutes without lifting the lid. Once the liquid is absorbed, turn off the heat but keep the lid on for an additional five minutes. Finally, use a fork to aerate the rice.
Pro Tip: Thermal carryover continues to cook the center of the rice grains even after the flame is off. Lifting the lid prematurely releases the steam pressure, which can result in unevenly cooked, crunchy rice.
The Deep Dive
Nutritionally, this dish is a powerhouse. A standard serving provides approximately 350 calories, with 25 grams of protein and 40 grams of complex carbohydrates. It is naturally gluten free as long as your broth is certified. For a vegan version, swap the beef for protein-rich lentils and use a vegetable bouillon. For keto enthusiasts, replace the rice with riced broccoli and increase the healthy fats with a dollop of sour cream.
The Fix-It: If your rice is too crunchy, add two tablespoons of hot broth and cover for five more minutes. If it is too mushy, remove the lid and cook over medium heat for three minutes to evaporate excess moisture. If the flavor is flat, add a splash of apple cider vinegar or a squeeze of fresh lemon; acidity acts as a volume knob for salt and spices.
Meal Prep: To maintain day-one quality, store leftovers in airtight glass containers. When reheating, add a teaspoon of water before microwaving to create a mini steam chamber. This prevents the rice from dehydrating and keeps the beef tender.
The Wrap-Up
Mastering yellow rice and ground beef recipes is like having a culinary superpower in your back pocket. It is a vibrant, one-pan wonder that proves healthy eating does not have to be bland or complicated. By understanding the science of the sear and the importance of the steam, you have elevated a simple skillet meal into a gourmet experience. Now, grab your favorite bowl, top it with some fresh cilantro, and enjoy the golden glow of a perfect dinner.
The Kitchen Table
Can I use brown rice for this recipe?
Yes, but you must increase the liquid ratio and the cooking time. Brown rice requires about forty five minutes to soften the bran layer. Check the package instructions and add an extra half cup of broth to ensure the beef does not dry out.
How do I make the rice more yellow?
For the most intense pigment, use a combination of turmeric and a pinch of saffron. Ensure you sauté the spices in the fat before adding liquid. This fat soluble activation allows the colors and flavors to bloom more vividly throughout the entire dish.
What is the best way to prevent mushy rice?
Always rinse your rice under cold water until the water runs clear to remove surface starch. Additionally, ensure you toast the grains in oil or fat before adding liquid. This creates a protective seal that keeps each grain distinct and firm.
Can I freeze this skillet meal?
Absolutely. This dish freezes exceptionally well for up to three months. Allow it to cool completely before transferring to a freezer-safe bag. Press the bag flat to remove air, which prevents freezer burn and allows for faster, more even thawing later.