
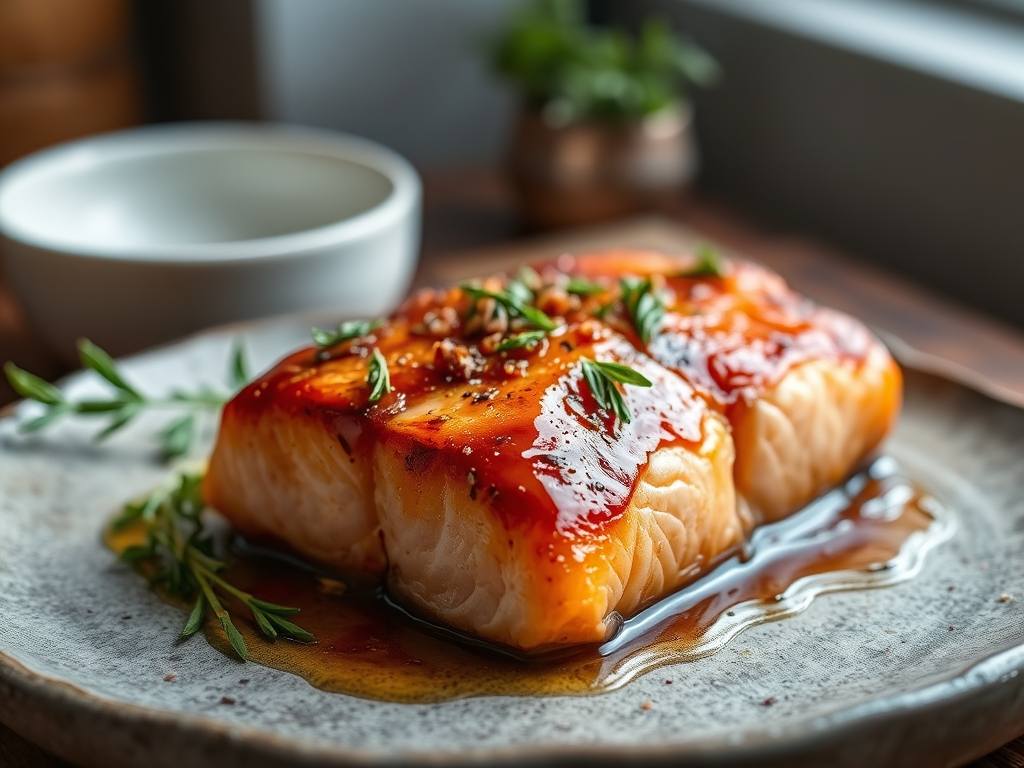
Imagine the sound of a heavy-bottomed skillet meeting a high-heat flame; it is a sharp, metallic ring that signals the start of something transformative. You are standing in your kitchen, and within twenty minutes, you will be biting into a fillet that boasts a shatter-crisp skin and a center so buttery it practically dissolves on the tongue. Finding glazed salmon recipes easy enough for a Tuesday but elegant enough for a gallery opening is the ultimate culinary flex. We are moving beyond the basic salt-and-pepper routine into a world where viscosity, sugar-to-acid ratios, and thermal conductivity do the heavy lifting for you. This is about more than just dinner; it is about mastering the Maillard reaction to create a lacquered finish that would make a French saucier weep with joy.
The Gathers:
Your mise-en-place is the foundation of efficiency. Start with the protein: high-quality Atlantic or King salmon fillets, ideally center-cut for uniform thickness. You will need a viscous sweetener like raw honey or maple syrup; these contain complex sugars that caramelize at different rates, providing a deeper flavor profile. For the acid, reach for rice vinegar or fresh lime juice to provide a piquant counterpoint to the rich omega-3 fats.
Use a microplane to zest fresh ginger and garlic into a fine paste. This increases the surface area, allowing the aromatics to infuse the glaze without leaving chunky, burnt bits in the pan. Your fat source should be a high-smoke-point oil like avocado oil or clarified butter. Smart Substitutions: If you are dodging soy, liquid aminos offer the same umami punch with less sodium. If honey is out, a reduction of pomegranate molasses creates a tart, velvety coating that clings to the fish beautifully.
The Clock:
In the world of professional cooking, we talk about "Chef's Flow." This is the art of overlapping tasks so that no second is wasted. Your total active time for these glazed salmon recipes easy is exactly eight minutes. The prep takes five minutes; this involves whisking your glaze in a small saucier and patting the fish dry. The cook time is a tight twelve minutes.
The flow works like this: while your skillet preheats, you season. While the first side sears, you tidy your station with a bench scraper. While the fish rests, you reduce the remaining glaze. By the time the internal temperature stabilizes, your sides are plated and you are ready to pour the wine. This is not rushing; it is rhythmic precision.
The Masterclass:
1. The Desiccation Ritual
Use a lint-free paper towel to press every molecule of moisture off the skin. Moisture is the enemy of the sear; it creates steam, which leads to rubbery texture.
Pro Tip: This is the science of evaporative cooling. If the surface is wet, the energy of the pan goes into boiling the water rather than browning the protein. A bone-dry surface ensures an immediate Maillard reaction.
2. The Cold-Pan Start for Skin
Place the salmon skin-side down in a cold, heavy-bottomed skillet, then turn the heat to medium-high. Use tongs to press the fillet down firmly for the first thirty seconds.
Pro Tip: This allows the subcutaneous fat to render slowly. By starting cold, you prevent the protein fibers from "shocking" and curling, resulting in a perfectly flat, potato-chip-crisp skin.
3. The Emulsion Whisk
While the fish sears, whisk your glaze ingredients vigorously. You want to aerate the mixture slightly to ensure the sugars and acids are fully integrated.
Pro Tip: Creating a temporary emulsion ensures that the glaze coats the fish evenly rather than breaking into a greasy mess when it hits the heat.
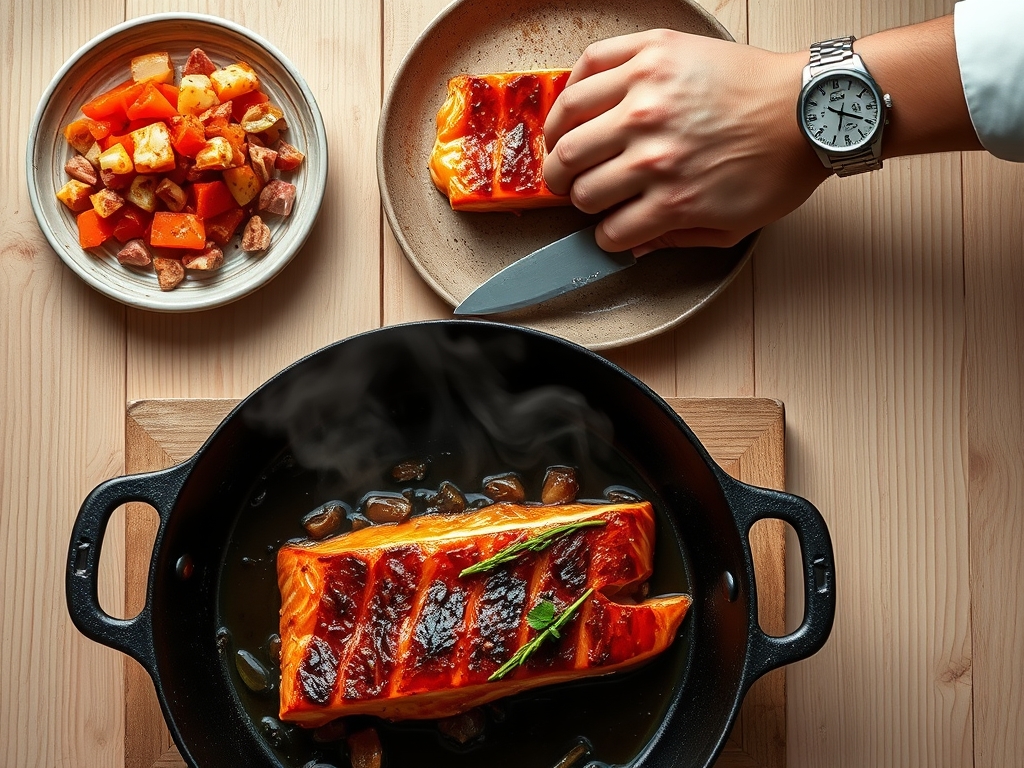
4. The Flip and Glaze
Once the skin is crisp, flip the fish. Immediately pour your glaze into the pan, allowing it to bubble and thicken around the fillets.
Pro Tip: This is enzymatic browning at high speed. The sugars in the glaze react with the amino acids in the fish, creating hundreds of new flavor compounds in seconds.
5. The Basting Technique
Use a large spoon to continuously bath the top of the salmon with the bubbling glaze. This is called arroser in professional kitchens.
Pro Tip: Basting creates a heat jacket around the fish, cooking the top gently while the glaze reduces into a thick, sticky lacquer.
6. The Digital Check
Remove the salmon when a digital scale or meat thermometer reads 125 degrees Fahrenheit for medium-rare.
Pro Tip: Account for thermal carryover. The internal temperature will rise another 5 to 7 degrees while the fish rests, bringing it to a perfect, flakey 132 degrees.
7. The Deglaze Finish
If the pan looks dry, add a splash of water or sake to deglaze the browned bits (fond) from the bottom. Swirl it into the remaining sauce.
Pro Tip: The fond contains the highest concentration of umami. Incorporating it back into the sauce maximizes the savory profile of the dish.
8. The Rest Period
Transfer the fillets to a warm plate and let them sit for three minutes before serving.
Pro Tip: Resting allows the muscle fibers to relax and reabsorb the juices. If you cut in too soon, the moisture will flood the plate, leaving the fish dry.
9. The Acid Pop
Just before serving, hit the fish with a final squeeze of fresh citrus or a sprinkle of flaky sea salt.
Pro Tip: Salt and acid are flavor magnifiers. They brighten the heavy fats and sugars, making the flavors "vibrate" on the palate.
10. The Garnish Texture
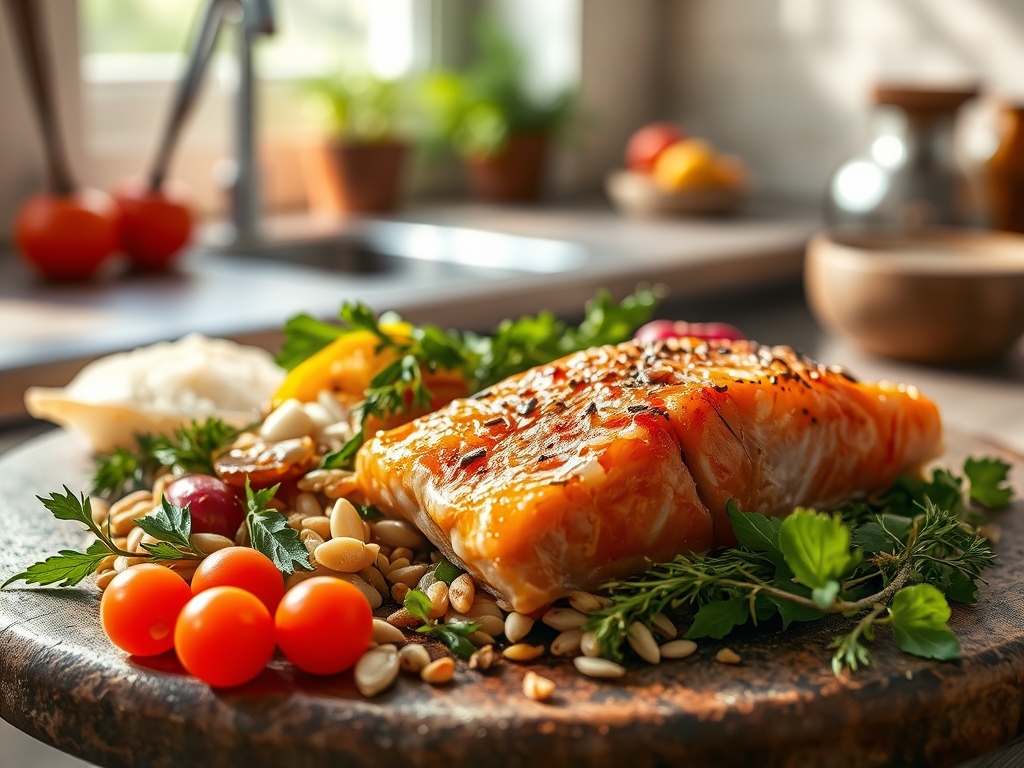
Add toasted sesame seeds or micro-greens for a final textural contrast.
Pro Tip: Contrast is the key to sensory satisfaction. The crunch of a garnish offsets the soft, fatty texture of the glazed salmon.
The Deep Dive:
From a nutritional standpoint, this dish is a powerhouse. A standard 6-ounce fillet provides roughly 34 grams of high-quality protein and a dense hit of Vitamin B12 and Selenium. For those on specific paths, the swaps are simple. Keto followers should replace honey with a monk fruit syrup. Vegan "salmon" made from marinated carrots or tofu can be glazed using the same reduction techniques.
The Fix-It:
- Burnt Glaze: If the sugar burns, the pan was too hot. Fix it by adding a splash of heavy cream or coconut milk to mellow the bitterness.
- Stuck Skin: If the fish won't release, it is not ready. Wait another thirty seconds; the protein will naturally "release" once the crust has formed.
- Albumin Bleed: Those white spots are just coagulated protein. It happens when salmon cooks too fast. Fix it by lowering the heat and basting more frequently next time.
Meal Prep: To reheat, avoid the microwave. Use a low oven (275 degrees) with a splash of water covered in foil. This creates a gentle steam chamber that restores the fat's silkiness without overcooking the core.
The Wrap-Up:
You now have the technical blueprint for the most impressive, lightning-fast dinner in your repertoire. By understanding the physics of the sear and the chemistry of the glaze, you have graduated from a recipe-follower to a culinary architect. These glazed salmon recipes easy are your new secret weapon for weeknights that require a little extra sparkle. Now, grab that skillet and let the Maillard reaction work its magic.
The Kitchen Table:
How do I get the skin extra crispy?
Always start with a cold pan and pat the skin completely dry. Use a heavy-bottomed skillet to ensure even heat distribution. Pressing the fish down with a spatula for the first thirty seconds prevents the skin from curling away from the heat.
What is the best way to tell if salmon is done?
Use a digital thermometer to check for an internal temperature of 125-130 degrees Fahrenheit. The fish should be opaque on the outside but still slightly translucent in the center. It should flake easily when pressed with a fork.
Can I use frozen salmon for these recipes?
Yes, but you must thaw it completely in the refrigerator first. Pat it extremely dry to remove excess moisture from the freezing process. Frozen fillets often have more surface moisture, so a thorough drying ritual is essential for a good sear.
Why did my glaze turn into hard candy?
The sugar in your glaze reached the "hard ball" stage because it was cooked too long or at too high a temperature. To fix this, whisk in a tablespoon of warm water or broth to thin the sauce back to a pourable consistency.