
The smell of roasting poultry is a universal love language; it is the scent of a home that is loved and well-fed. When you are searching for the best chicken recipes ina garten, you are really looking for the intersection of foolproof technique and unapologetic luxury. Ina teaches us that chicken is not just a protein; it is a blank canvas for high-quality butter and piquant lemons.
Whether you are hosting a high-stakes dinner party or just trying to survive a Tuesday, these ten iconic methods provide the blueprint for success. We are talking about skin so crisp it shatters like glass and meat so tender it defies the laws of thermodynamics. It is about the confidence that comes from knowing exactly how your heavy-bottomed skillet will interact with a bird.
From the legendary Engagement Chicken to the sophisticated Chicken Marbella, the secret lies in the details. We do not just cook; we engineer flavor through salt-brining, fat-rendering, and the strategic use of acid. Grab your favorite apron and a glass of "good" white wine. We are about to transform your kitchen into a Hamptons sanctuary where the chicken is always juicy and the guests never want to leave.
The Gathers:
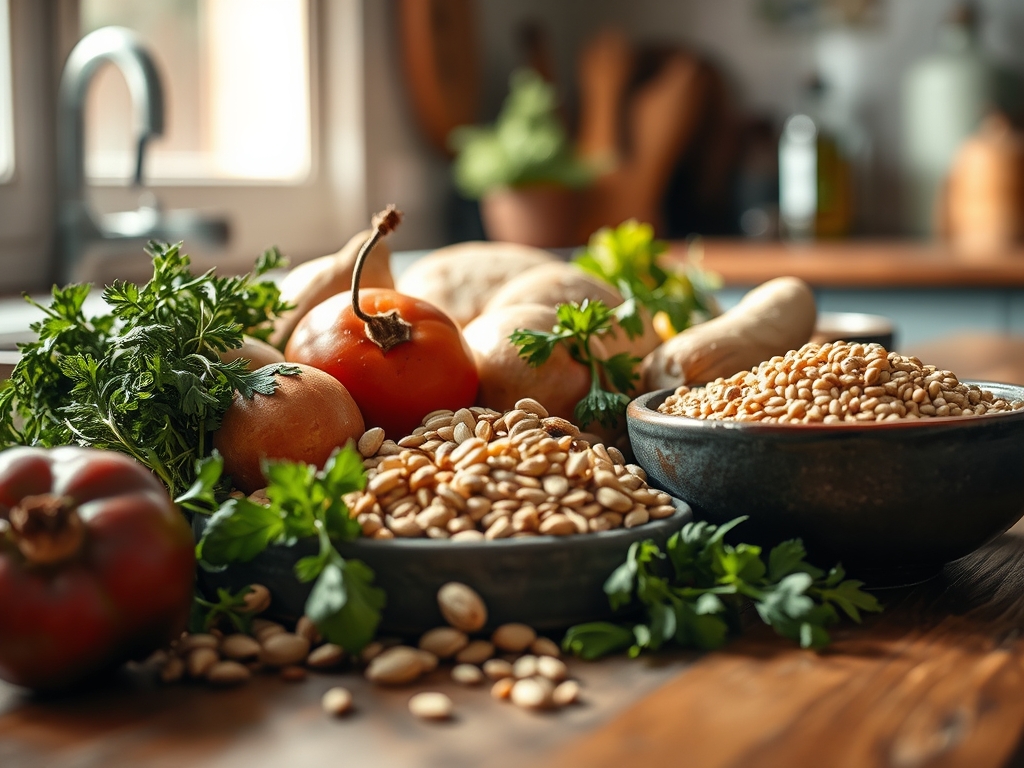
Setting your mise-en-place is the difference between a chaotic kitchen and a professional flow. For these iconic recipes, your station should look like a botanical garden met a butcher shop. You will need high-moisture aromatics: garlic cloves that feel heavy for their size, fresh thyme with supple stems, and lemons that yield to a gentle squeeze, indicating a high juice-to-pith ratio.
The star of the show is the bird itself. Always look for air-chilled chicken; this prevents the meat from being water-logged, ensuring your seasoning penetrates the muscle fibers rather than sliding off in a puddle of purge. You will also need "the good stuff": Maldon sea salt for its flaky texture, high-fat European butter for better emulsification, and a dry white wine like a Sancerre or Sauvignon Blanc to provide the necessary acidity to cut through the lipids.
Smart Substitutions:
If you cannot find fresh tarragon, do not reach for the dried version; it tastes like dust. Instead, use chervil or a splash of anise liqueur to mimic that licorice note. If you are dodging dairy, a high-quality avocado oil can stand in for butter during the high-heat roasting phase, though you will lose the Maillard reaction benefits of milk solids. For a gluten-free thickener in sauces, skip the flour and use a cornstarch slurry or simply reduce your liquid by half to create a naturally viscous glaze.
The Clock: Chef's Flow
Timing is a chemical equation. Most of these classics require a 15-minute active prep window followed by a 45 to 60-minute roast. The "Chef's Flow" dictates that you preheat your oven at least 30 minutes prior to entry. This ensures the stone or metal of your roasting pan reaches thermal equilibrium, preventing the chicken from sticking. Always account for a 10-minute rest period; this is not optional. It allows the internal pressure to stabilize, ensuring the juices stay in the meat rather than on your cutting board.
The Masterclass:
1. The Salt and Pat
Dry the chicken thoroughly with paper towels. Moisture is the enemy of crispiness. Sprinkle a generous amount of Kosher salt over the skin and inside the cavity.
Pro Tip: This utilizes osmosis. The salt draws moisture out, creates a brine, and is then reabsorbed into the meat, seasoning it at a cellular level while drying the skin for maximum crunch.
2. The Aromatic Stuffing
Stuff the cavity with halved lemons, a whole head of garlic, and a bunch of fresh thyme. Do not pack it too tightly; air needs to circulate.
Pro Tip: As the chicken heats, the essential oils in the aromatics volatilize. This creates an internal steam chamber that infuses the meat from the inside out with piquant citrus notes.
3. The Fat Application
Brush the skin with melted butter or olive oil. Use your hands to ensure every nook and cranny is coated. This is where your microplane comes in handy to zest lemon directly over the fat.
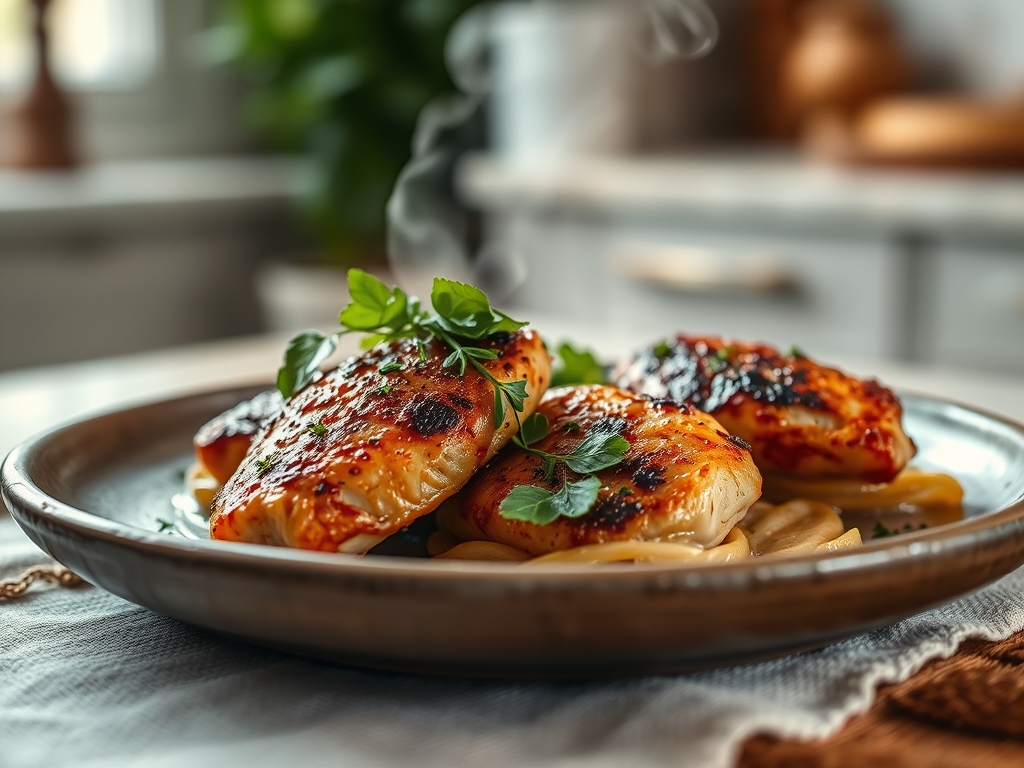
Pro Tip: Fat is a heat conductor. By coating the skin, you create a uniform surface that facilitates enzymatic browning, also known as the Maillard reaction, resulting in that deep golden hue.
4. The High-Heat Roast
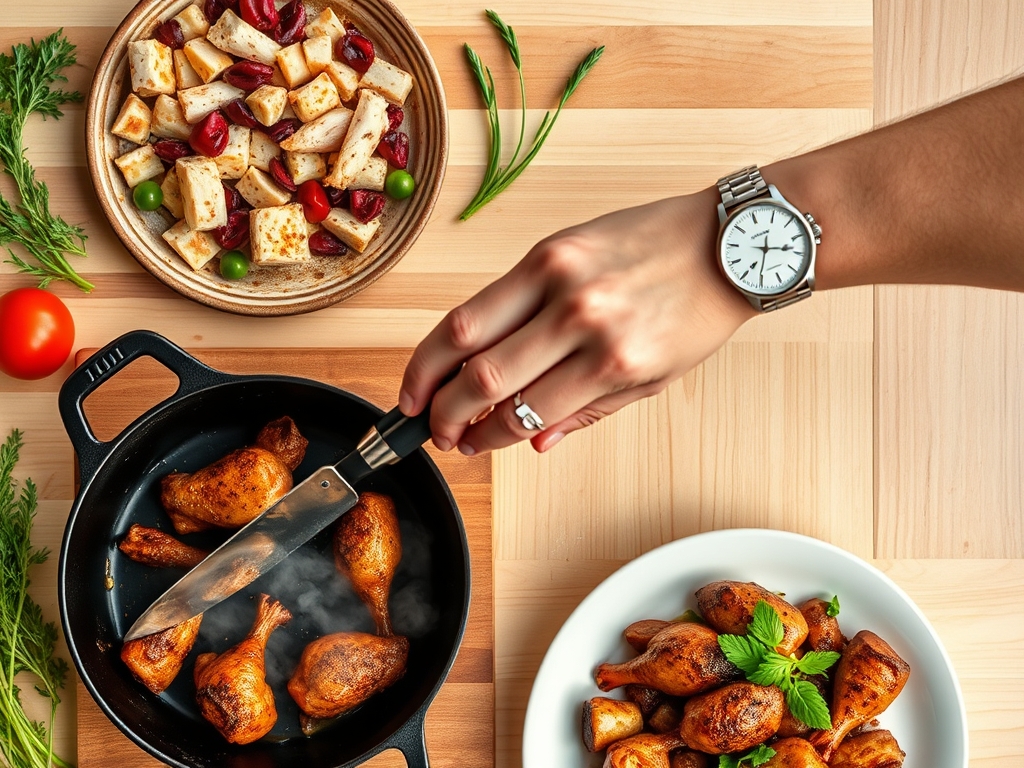
Place the bird in a heavy-bottomed skillet or roasting pan. Roast at 425 degrees Fahrenheit. You should hear a sizzle the moment it hits the oven rack.
Pro Tip: High heat causes the subcutaneous fat to render quickly. This liquid fat then "fries" the skin from the underside, creating a texture similar to parchment paper.
5. The Deglaze
Once the chicken is removed, place the roasting pan on the stovetop. Pour in wine or stock and use a bench scraper or wooden spoon to lift the brown bits.
Pro Tip: Those brown bits are called fond. They are concentrated proteins and sugars that, when dissolved in liquid, create a complex, savory base for a pan sauce.
6. The Rest and Carve
Transfer the chicken to a board and tent loosely with foil. Wait ten minutes before using your sharpest carving knife to separate the joints.
Pro Tip: This accounts for thermal carryover. The internal temperature will rise by about 5 degrees after removal. Resting allows the muscle fibers to relax and reabsorb the juices.
The Deep Dive:
When we look at the macro profile, these chicken dishes are high-protein powerhouses. A standard serving provides roughly 35g of protein and 12g of healthy fats, depending on how much "gravy" you indulge in. For my Keto friends, this is a dream; just skip the flour in the sauce. For Vegans, you can apply these exact aromatic roasting techniques to a head of cauliflower or a "roast" made of seitan to achieve a similar flavor profile.
The Fix-It:
- Soggy Skin: This happens if you crowd the pan. Use a larger vessel to allow steam to escape.
- Dry Breast Meat: You likely overcooked it. Use a digital scale or meat thermometer to pull the bird at 160 degrees; carryover will take it to the safe 165.
- Broken Sauce: If your lemon-butter sauce separates, it lost its emulsification. Whisk in a teaspoon of cold water or a knob of cold butter off the heat to bring it back together.
Meal Prep Science:
To reheat without that "leftover" taste, avoid the microwave. The microwave agitates water molecules, making the chicken rubbery. Instead, place slices in a saucier with a splash of stock and heat gently on the stove. This re-hydrates the proteins without toughening them.
The Wrap-Up:
Mastering the best chicken recipes ina garten is about more than just following a list; it is about understanding the soul of the ingredients. When you treat a simple bird with the respect of a scientist and the heart of a friend, the results are nothing short of magical. You now have the technical prowess to render fat like a pro and deglaze a pan until it shines. Go forth, put on some jazz, and make a chicken that would make Ina proud. You've got this!
The Kitchen Table:
How do I get the skin extra crispy?
Ensure the chicken is bone-dry before cooking. Salt the skin 24 hours in advance and leave it uncovered in the fridge. This air-drying process removes surface moisture, allowing the fat to render and crisp the skin instantly in high heat.
Can I use frozen chicken for these recipes?
Yes, but it must be fully thawed in the refrigerator first. Frozen cells contain ice crystals that rupture cell walls; if not thawed properly, the chicken will release too much water, steaming the meat instead of roasting it to perfection.
What is the best way to zest a lemon?
Use a microplane held teeth-side up. This allows you to see exactly how much of the yellow flavedo you are removing. Avoid the white pith at all costs; it is incredibly bitter and will ruin the delicate balance of your sauce.
Why does Ina always use Kosher salt?
Kosher salt has larger, jagged crystals that are easier to pinch and distribute evenly. It lacks the metallic taste of iodized table salt and dissolves beautifully into the meat, enhancing flavors without making the dish taste overly salty or chemical.