
Picture the scent of a heavy bottomed skillet hitting its smoke point as a marbled ribeye makes first contact. That sizzle is not just noise; it is the kinetic energy of amino acids and sugars colliding to create hundreds of new flavor compounds. When you are hunting for the ultimate main dish beef recipes, you are actually looking for the perfect marriage of fat, heat, and timing. Whether it is a slow braise that transforms tough connective tissue into silk or a high heat sear that builds a savory crust, beef is the undisputed king of the dinner table. It carries a weight and a richness that other proteins simply cannot match. We are going to dive into the molecular magic that turns a raw cut of muscle into a masterpiece that will have your guests asking for your secret. From the chemistry of the sear to the physics of resting meat, let us master the art of the centerpiece.
The Gathers:
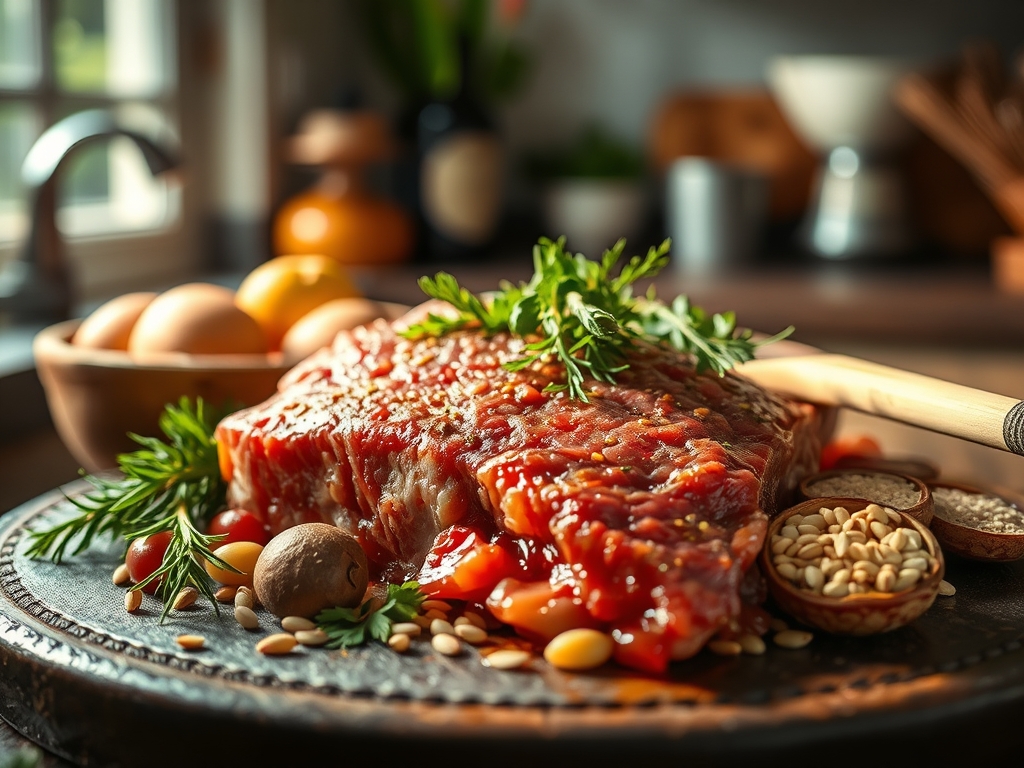
To execute world class main dish beef recipes, your mise en place must be precise. Start with your primary protein: look for heavy intramuscular marbling. These white flecks of intramuscular fat are pure flavor insurance. You will need a high smoke point oil like avocado or grapeseed; extra virgin olive oil will oxidize and turn bitter at the temperatures we require for a proper sear. Gather your aromatics: fresh thyme sprigs, peeled garlic cloves, and cold unsalted butter for the final basting stage.
If you are working with tougher cuts like chuck or short rib, you will need a viscous braising liquid. A dry red wine like Cabernet Sauvignon provides the necessary acidity to break down collagen while adding deep, piquant notes. For the "Smart Substitutions," if you find yourself without wine, a splash of balsamic vinegar mixed with beef bone broth mimics that acidic profile beautifully. If you are avoiding dairy, swap the finishing butter for a high quality tallow to maintain that rich mouthfeel without the lactose. Always keep a digital scale nearby to ensure your salt ratios are exact; 1.5 percent salt by weight is the golden rule for seasoning thick cuts of beef.
The Clock
The "Chef's Flow" is all about managing thermal momentum. For a classic sear, you are looking at ten minutes of active prep and fifteen minutes of cooking, but the most important segment is the rest. You must account for at least ten minutes of resting time to allow the internal juices to redistribute. If you are executing a braise, your active time remains low at twenty minutes, but the "low and slow" phase requires three to four hours. During this time, the heat slowly melts the tough collagen into gelatin. Always work backward from your desired serving time. If dinner is at eight, a large roast needs to be out of the oven by seven thirty to ensure it reaches its final equilibrium temperature without losing its structural integrity.
The Masterclass
1. The Tempering Phase
Take your beef out of the refrigerator at least forty five minutes before cooking. Use a paper towel to pat the surface bone dry. Moisture is the enemy of a good crust because energy will be wasted evaporating water rather than browning the meat.
Pro Tip: This reduces the temperature gradient between the center and the exterior, preventing the "gray ring" effect where the outside overcooks before the middle is warm.
2. The Aggressive Seasoning
Apply kosher salt from a height of about twelve inches to ensure even distribution. Do not be afraid to use more than you think; a thick steak needs a significant crust to season the unseasoned interior of every bite.
Pro Tip: Salt acts as a humectant through osmosis, drawing moisture out and then reabsorbing the now salty brine to season the meat deeply.
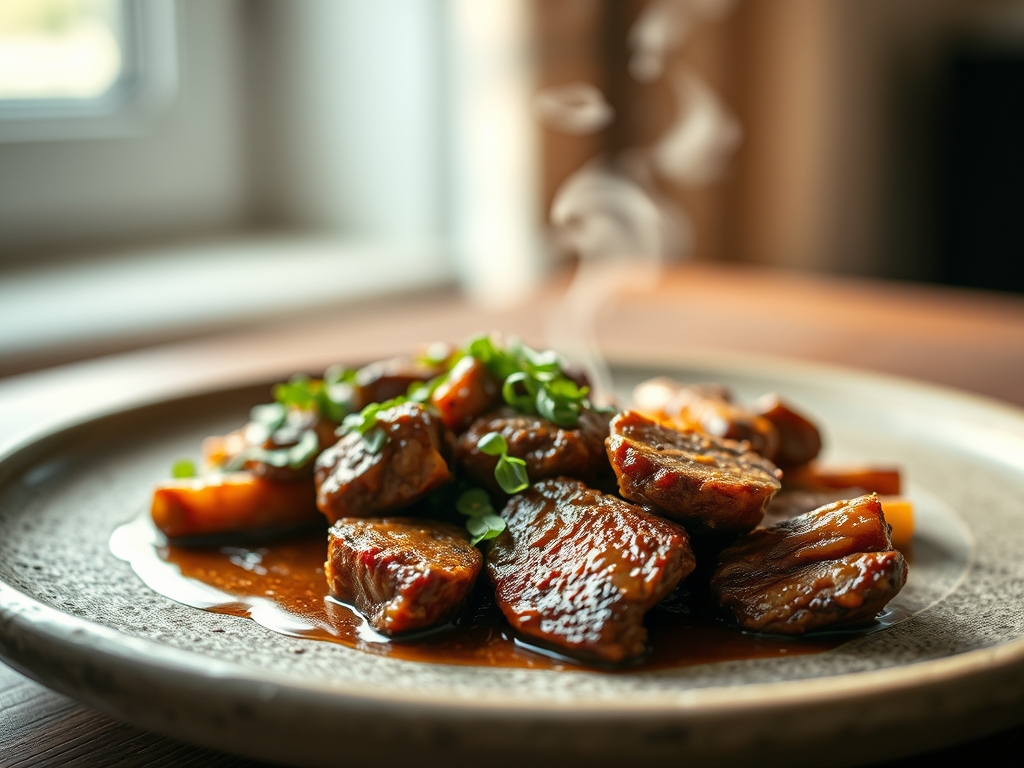
3. The Maillard Reaction
Heat your heavy bottomed skillet until the oil just begins to shimmer and wisps of smoke appear. Lay the beef away from you to avoid oil splashes. Use stainless steel tongs to press the meat down, ensuring maximum surface contact for a uniform sear.
Pro Tip: This chemical reaction occurs between 285 and 330 degrees Fahrenheit, creating the complex savory flavors that define high end beef dishes.
4. The Aromatic Butter Baste
Once you have flipped the meat, drop in your butter, garlic, and thyme. Tilt the pan so the butter pools at the bottom and use a large spoon to rapidly bathe the beef in the foaming fat.
Pro Tip: This is called "arroser." The butter acts as a heat transfer medium, cooking the nooks and crannies of the meat while infusing it with nutty, toasted milk solids.
5. The Precision Pull
Use a digital thermometer to check the internal temperature. For a perfect medium rare, pull the beef at 130 degrees Fahrenheit. It will continue to rise during the rest.
Pro Tip: This is known as thermal carryover. The residual heat on the surface continues to travel inward even after the meat is removed from the heat source.
6. The Essential Rest
Transfer the beef to a wire rack set over a sheet pan. Do not tent it tightly with foil or you will steam the crust you worked so hard to build. Let it sit for at least ten minutes.
Pro Tip: Resting allows the muscle fibers, which tightened during cooking, to relax and reabsorb the internal moisture, ensuring the juices stay in the meat rather than on your cutting board.
The Deep Dive
When we look at the macro nutrition of these main dish beef recipes, we are dealing with a powerhouse of bioavailable protein, B12, and heme iron. A standard six ounce serving provides roughly 42 grams of protein. For those on a Keto path, beef is the ultimate "zero carb" foundation. If you are cooking for a Vegan guest, you can apply these same searing techniques to "steaks" of lion's mane mushrooms or thick cut cauliflower, using miso paste to replicate the savory umami of the beef. For Gluten Free diners, simply ensure your braising liquids use cornstarch or a reduction method rather than a flour based roux.
The Fix-It:
- The Gray Meat: If your beef looks boiled rather than seared, your pan wasn't hot enough or was overcrowded. Fix it by removing the meat, reheating the pan until smoking, and finishing with a quick, high heat blast.
- The Tough Braise: If the meat is still chewy after three hours, the collagen hasn't fully converted. Fix it by adding another forty five minutes; you cannot rush the physics of connective tissue breakdown.
- The Oversalted Surface: If you slipped with the salt cellar, serve the beef with an unseasoned, acidic element like a bright gremolata or a vinegar based chimichurri to balance the palate.
Meal Prep Science: To reheat beef without it turning into rubber, use the "low and slow" method in a 250 degree oven with a splash of beef stock. This gently rehydrates the proteins without over-coagulating them, maintaining that "day one" tenderness.
The Wrap-Up
Mastering main dish beef recipes is about more than just following a list of ingredients; it is about understanding how heat interacts with protein. Once you grasp the power of the Maillard reaction and the patience required for a proper rest, you become the architect of your own kitchen. There is an incredible confidence that comes with knowing exactly how a piece of meat will behave under pressure. So, grab your favorite heavy skillet, trust your thermometer, and get ready to serve a meal that is as scientifically sound as it is delicious. You have got the tools and the technique; now go make something legendary!
The Kitchen Table
How do I get a restaurant quality crust at home?
The secret is surface dryness and high heat. Pat the beef with paper towels until bone dry and use a cast iron or stainless steel skillet. Wait for the oil to shimmer before adding the meat to ensure immediate browning.
Why is my beef always dry even when it is pink?
You likely skipped the resting phase. When you cut beef immediately after cooking, the internal pressure forces all the juices out. Resting for ten minutes allows the fibers to relax and hold onto that moisture for a juicy bite.
What is the best cut for a budget friendly main dish?
Look for "Chuck Eye" or "Flat Iron" steaks. These cuts offer the rich flavor and tenderness of expensive primary muscles like the Ribeye or Filet Mignon but at a fraction of the price due to their location on the animal.
Can I cook beef straight from the freezer?
Technically yes, but for the best results, thaw it completely. Cooking frozen beef leads to an uneven temperature gradient, often resulting in a charred exterior and a raw, cold center. Always temper your meat for at least thirty minutes.