
Imagine the scent of slow-roasted garlic and toasted oregano drifting through your kitchen; it is the kind of aroma that feels like a warm hug from a professional chef. When you master italian beef recipes oven style, you are not just making dinner; you are orchestrating a symphony of collagen breakdown and aromatic infusion. This is the ultimate comfort food for those who crave that iconic Chicago-style sandwich but want the precision and depth that only a controlled, low-temperature roast can provide. We are moving beyond the watery crockpot versions of the past. Today, we are focusing on the science of the sear and the magic of a long, slow braise that transforms a humble chuck roast into velvet.
The secret to success lies in the environment of the oven. Unlike a stovetop, the oven provides 360-degree radiant heat, which ensures even thermal distribution across the entire surface of the meat. This prevents the "hot spots" that can lead to tough fibers. We are looking for that perfect balance of a piquant jus and beef so tender it practically sighs when you touch it with a fork. Grab your favorite heavy-bottomed skillet and let us get into the chemistry of the perfect roast.
The Gathers:
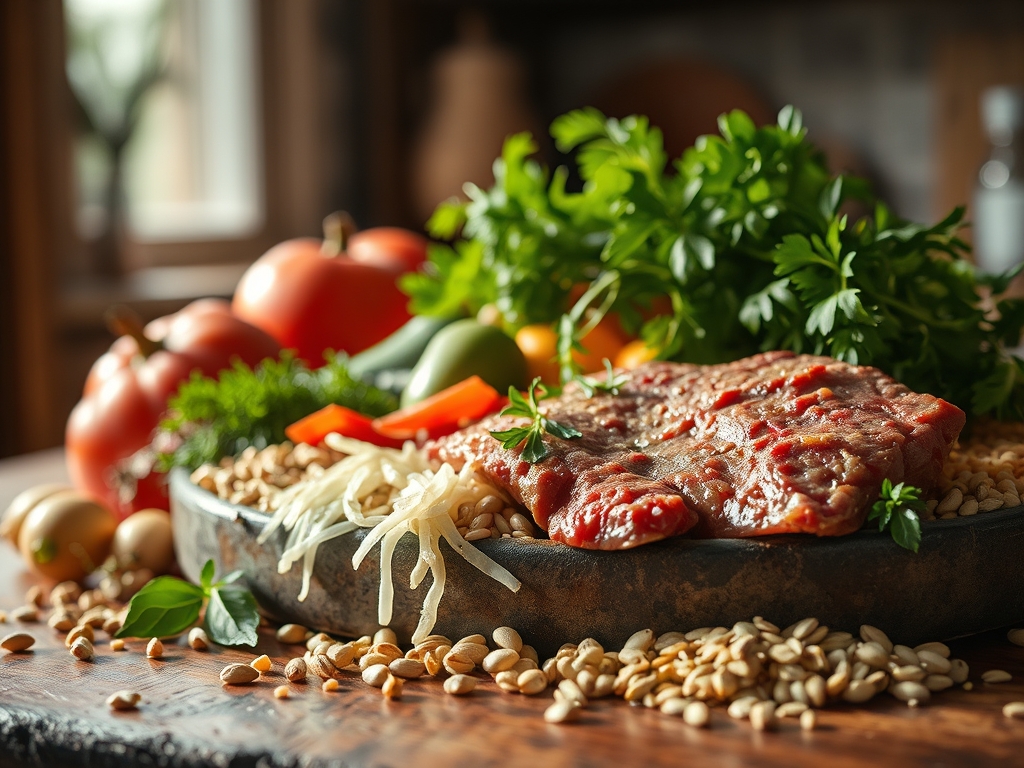
To achieve a restaurant-quality result, your mise-en-place must be impeccable. You will need a four-pound Boneless Beef Chuck Roast; this cut is essential because its high intramuscular fat and connective tissue will render into gelatin, providing a luxurious mouthfeel. For the aromatics, gather six cloves of garlic (use a microplane to create a paste for maximum surface area), two cups of high-quality beef bone broth, and a half-cup of piquant pepperoncini juice. The dry rub requires dried oregano, basil, red pepper flakes, and a significant amount of kosher salt to facilitate osmosis.
Smart Substitutions: If you cannot find a chuck roast, a bottom round or rump roast works, though they are leaner and require a slightly lower temperature to avoid drying out. For a deeper umami profile, swap one tablespoon of salt for one tablespoon of anchovy paste; it melts into the sauce and provides a savory backbone without tasting fishy. If you are avoiding nightshades, replace the pepperoncini with a splash of apple cider vinegar and extra cracked black pepper to maintain that necessary acidity.
The Clock
Efficiency in the kitchen is about the Chef's Flow. Total preparation time is approximately 20 minutes, while the active cooking time spans 3 to 4 hours. You should account for a 20-minute resting period post-roast.
The Flow: Start by tempering your meat at room temperature for 30 minutes while you prep your liquid base. Use this time to sharpen your knives and organize your tongs and saucier. Once the roast enters the oven, your active work is done. Use the final 30 minutes of cooking to prepare your rolls and toppings so everything peaks at the exact same moment.
The Masterclass
1. The Maillard Sear
Pat the beef bone-dry with paper towels. Heat a heavy-bottomed skillet over medium-high heat with a high-smoke-point oil like avocado oil. Sear the roast on all sides until a deep, mahogany crust forms.
Pro Tip: This is the Maillard Reaction, a chemical reaction between amino acids and reducing sugars that creates hundreds of different flavor compounds. Achieving a dark sear here is the only way to ensure a complex, savory profile in the finished jus.
2. Deglaze and Infuse
Remove the beef and set it aside. Pour a splash of broth into the hot skillet and use a bench scraper or wooden spoon to scrape up the brown bits (the fond). Add your garlic paste and dried herbs, allowing them to bloom in the residual fat for 30 seconds.
Pro Tip: Fat is a flavor carrier. By "blooming" your spices in the rendered beef fat before adding the rest of the liquid, you infuse the oil-soluble flavor compounds of the herbs more effectively than if you simply boiled them.
3. The Low and Slow Braise
Place the beef in a dutch oven and pour the herb-infused liquid and pepperoncini juice over it. The liquid should come halfway up the side of the meat. Cover tightly with a lid or heavy-duty foil to prevent evaporation. Slide it into a 300-degree Fahrenheit oven.
Pro Tip: Maintaining a temperature below the boiling point of water (212 degrees Fahrenheit) prevents the muscle fibers from tightening too quickly. This allows the collagen to transform into gelatin slowly, resulting in a succulent texture rather than a stringy one.
4. The Rest and Shred
Once the internal temperature reaches 205 degrees Fahrenheit, remove the roast. Let it rest in its juices for at least 20 minutes before using two forks or a digital scale to portion and shred.
Pro Tip: This stage utilizes thermal carryover. Resting allows the muscle fibers to relax and reabsorb the viscous juices. If you cut it too soon, the moisture will escape, leaving you with dry meat despite the long braise.
The Deep Dive
Macro Nutrition: A standard serving (approx. 5 oz of meat with jus) contains roughly 350 calories, 24g of fat, and 32g of protein. It is naturally low in carbohydrates, making it an excellent centerpiece for various dietary needs.
Dietary Swaps: For a Keto version, serve the beef in a bowl over cauliflower mash instead of a roll. For Vegan guests, use the same spice profile and braising liquid with large chunks of Lion's Mane mushrooms or rehydrated soy curls; they mimic the fibrous texture of beef surprisingly well. To keep it Gluten-Free, ensure your beef broth is certified and serve on GF-certified hoagie rolls.
The Fix-It:
- Tough Meat: If it is still chewy, it simply has not cooked long enough. Put it back in for 30 minutes. The collagen needs time to melt.
- Salty Jus: If the liquid reduced too much and tastes like a salt lick, whisk in a splash of water or a pinch of sugar to balance the palate.
- Greasy Surface: If there is too much rendered fat floating on top, use a wide spoon to skim the surface or chill the liquid so the fat solidifies for easy removal.
Meal Prep: Italian beef is actually better on day two. To reheat, simmer the meat in its own jus over low heat in a saucier. This prevents the proteins from toughening up in the microwave and ensures the flavors remain aerate and fresh.
The Wrap-Up
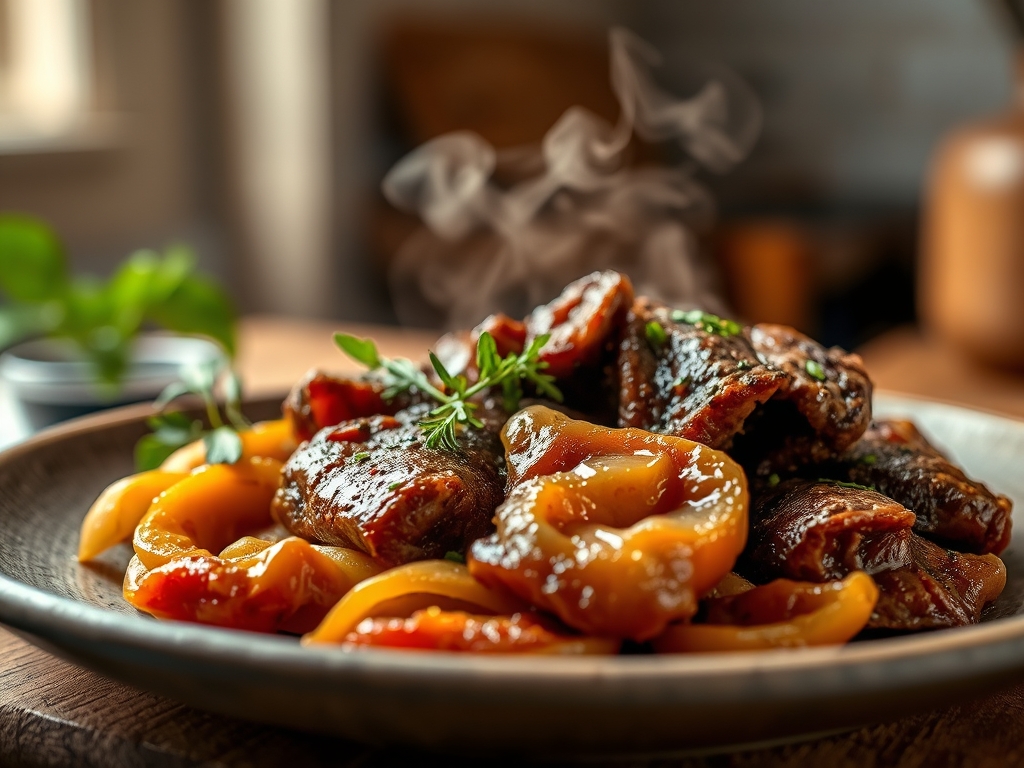
You have now mastered the technical art of the oven-braised Italian beef. By understanding the relationship between heat, time, and connective tissue, you have elevated a simple sandwich into a gourmet experience. Whether you serve it "dipped" (submerged in jus) or "dry," the depth of flavor you have created is a testament to your culinary skill. Go ahead and share this with your favorite people; they will taste the science in every bite.
The Kitchen Table
Can I use a different cut of meat?
Yes, but stick to tougher cuts like bottom round or chuck. These contain the necessary connective tissue that breaks down during a long braise. Leaner cuts like sirloin will become dry and chalky in the oven.
How do I get that "dipped" sandwich style?
Once your beef is shredded, submerge your sliced hoagie roll directly into the warm jus for three seconds. This allows the bread to absorb the savory liquid without completely disintegrating before you can take a bite.
Why is my jus cloudy?
Cloudiness usually comes from boiling the liquid too hard or over-shredding the meat into tiny particles. To keep it clear, maintain a gentle simmer and use a fine-mesh strainer to remove any small debris before serving.
What is the best way to store leftovers?
Store the shredded beef completely submerged in its jus in an airtight container. This prevents oxidation and keeps the meat moist. It will stay fresh in the refrigerator for up to four days or freeze for three months.