
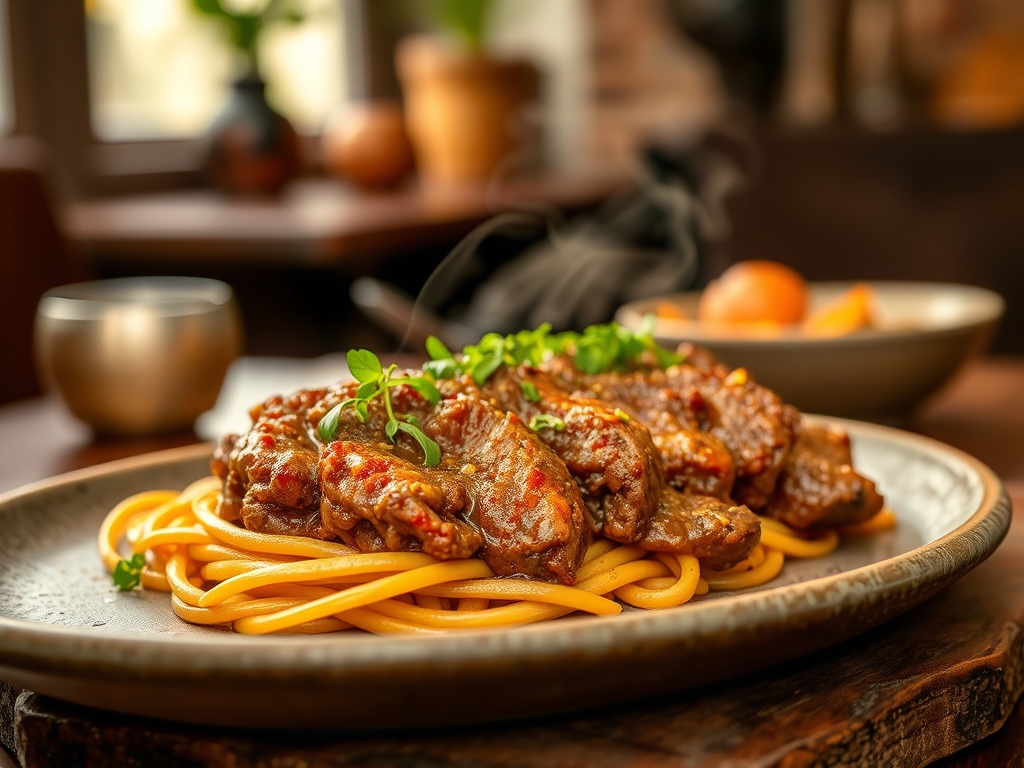
The kitchen is humming; the air is heavy with the intoxicating scent of rendering fat and toasted spices. You are standing over a heavy bottomed skillet, watching as raw, ruby-red protein transforms into something deeply caramelized and savory. Finding the best ground beef recipes is about more than just a quick meal; it is about mastering the Maillard reaction to unlock complex, nutty flavor profiles that turn a humble pound of meat into a five-star experience. Whether you are craving a piquant Korean bowl or a classic, viscous Bolognese, ground beef is the ultimate canvas for culinary chemistry.
Ground beef is a staple for a reason. It is accessible, versatile, and possesses a high surface-area-to-volume ratio, which means every tiny morsel can be perfectly seared. We are moving beyond the basic burger. We are looking at techniques that involve emulsifying fats into sauces and deglazing pans to capture every bit of fond. This guide is your backstage pass to the most efficient, flavor-dense dinners you can whip up on a Tuesday night.
The Gathers:
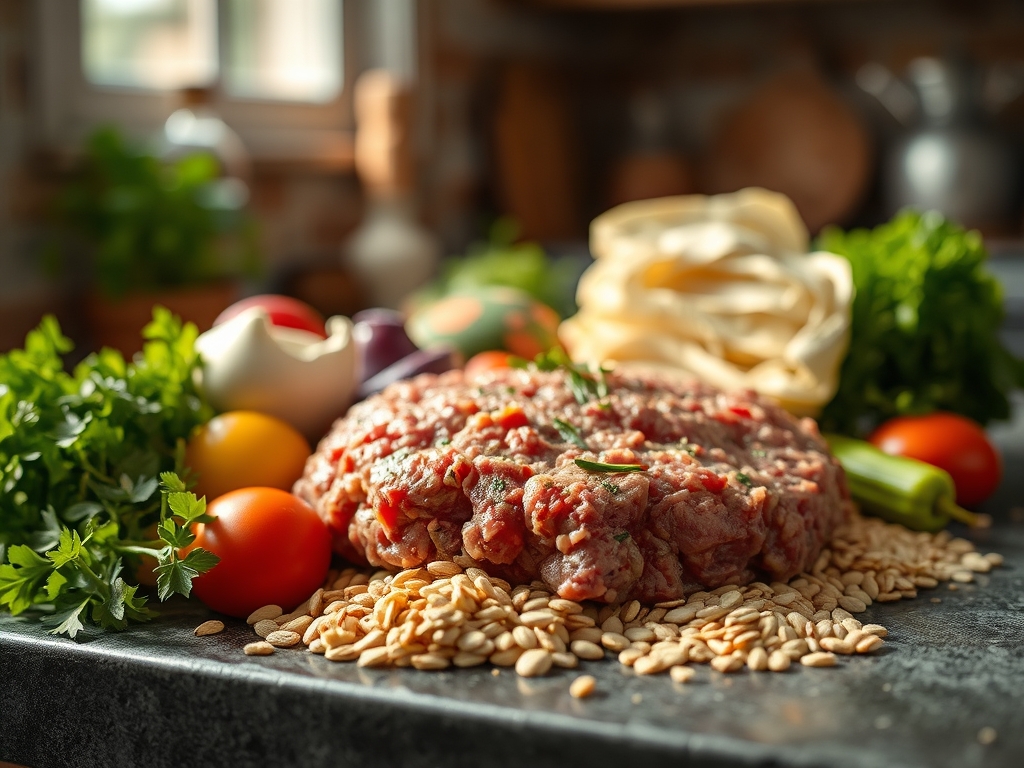
Mise-en-place is the heartbeat of a functional kitchen. Before you even ignite the burner, your workstation should be a shrine to organization. You will need high-quality ground beef, ideally an 80/20 blend for optimal moisture retention. The fat content is not just for calories; it acts as a solvent for fat-soluble vitamins and flavor compounds. Gather your aromatics: yellow onions for their high sugar content, garlic for its pungent sulfur compounds, and perhaps some ginger for a piquant bite.
Your tool kit is just as vital. Reach for a microplane to create a fine garlic paste that melts into the meat. A bench scraper is essential for transferring chopped vegetables without losing a single cube. For the meat itself, a heavy-bottomed skillet (cast iron or tri-ply stainless steel) is non-negotiable for even heat distribution. If you are making a sauce-heavy dish, a saucier with its rounded bottom will help you whisk without scorching the corners.
Smart Substitutions:
If you need to lighten the load, ground turkey or chicken can work, but you must add a teaspoon of Worcestershire sauce or mushroom powder to mimic the beefy umami. For a plant-based pivot, lentils or crumbled tempeh offer a similar texture. If you are out of fresh onions, use a dash of onion powder, but be wary of the salt content in pre-mixed seasonings.
The Clock: Mastering the Chef's Flow
Efficiency in the kitchen is about overlapping tasks, a concept known as "Chef's Flow." The best ground beef recipes usually require about 15 minutes of active prep and 20 to 30 minutes of cooking. While your skillet is preheating (which takes about 3 to 5 minutes for cast iron), you should be dicing your aromatics. Never put cold meat into a cold pan; you want that immediate sizzle to prevent the meat from steaming in its own juices.
Once the meat is browning, use that 8-minute window to prepare your side dishes or whisk together your finishing sauces. This "staggered start" ensures that everything hits the table at the same time. Remember to account for thermal carryover; ground beef will continue to cook for a few minutes after being removed from the heat, so pull it just as it reaches your desired doneness to avoid a grainy, dry texture.
The Masterclass:
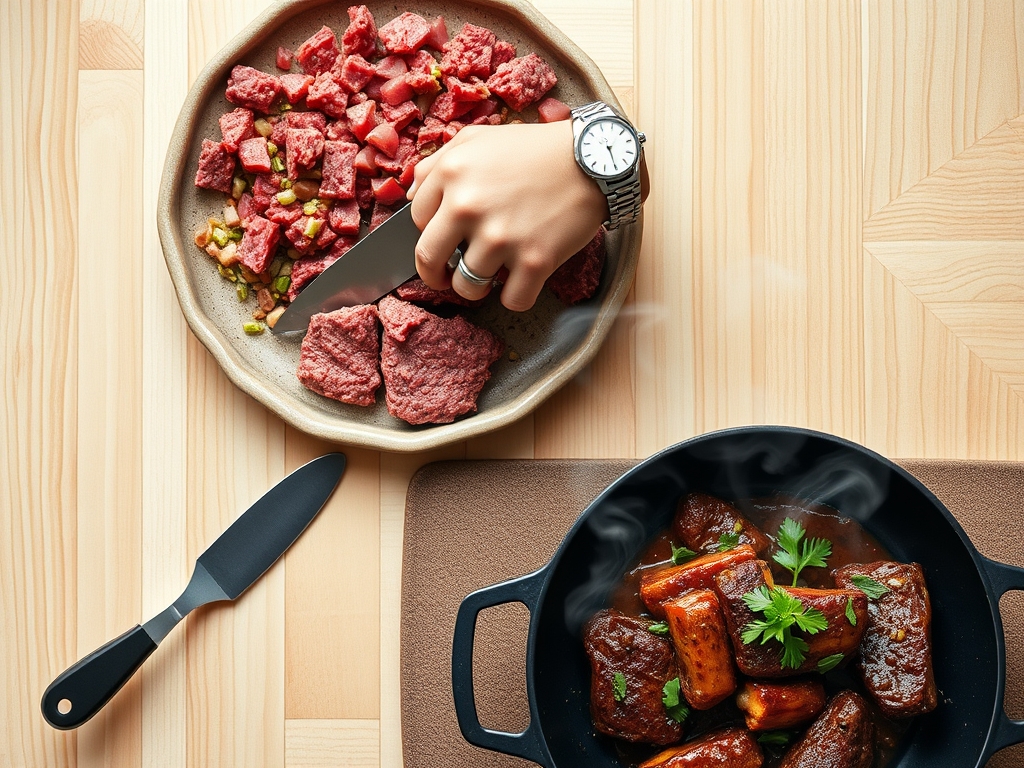
1. The High-Heat Sear
Place your skillet over medium-high heat until a drop of water flicked onto the surface dances and evaporates instantly. Add your beef in a flat layer. Do not touch it for at least three minutes. You are waiting for the Maillard reaction, a chemical reaction between amino acids and reducing sugars that creates that signature brown crust.
Pro Tip: This is not just browning; it is molecular transformation. If you stir too early, you lower the surface temperature and the meat will grey rather than sear. Use tongs to flip large chunks for maximum surface contact.
2. Deglazing the Fond
Once the meat is browned and removed, you will see brown bits stuck to the bottom of the pan. This is called fond. Pour in a splash of liquid (wine, stock, or even water) and use a wooden spoon to scrape those bits up. This process, known as deglazing, incorporates concentrated flavor back into your dish.
Pro Tip: Use a cold liquid to deglaze a hot pan. The thermal shock helps lift the caramelized proteins more efficiently than warm liquid would.
3. Aerating the Aromatics
Add your onions and peppers to the rendered fat. Sauté until translucent. This process softens the cellulose in the cell walls, making the vegetables tender and releasing their natural sweetness to balance the savory beef.
Pro Tip: Adding a pinch of salt now draws out moisture through osmosis, which speeds up the softening process and prevents the vegetables from burning.
4. Emulsifying the Sauce
If your recipe calls for a sauce, like a creamy Stroganoff or a silky pasta sauce, you must emulsify the fats. Slowly whisk in your liquid components while the pan is simmering. This binds the fat and water molecules together, creating a smooth, viscous texture rather than an oily mess.
Pro Tip: Using a saucier is helpful here. The curved sides allow your whisk to reach every millimeter of the sauce, ensuring a stable emulsion.
5. The Final Infusion
Lower the heat and return the beef to the pan. Add your delicate herbs (like parsley or basil) at the very end. Heat can destroy the volatile oils in fresh herbs, so a quick toss right before serving is best to keep the flavors bright and piquant.
Pro Tip: This is the time to check your seasoning. Use a digital scale if you are batch-cooking to ensure consistency in salt ratios across multiple meals.
The Deep Dive: Nutrition and Troubleshooting
Ground beef is a nutritional powerhouse, packed with Vitamin B12, zinc, and iron. An 80/20 blend provides roughly 250 calories per 4-ounce serving, with 19 grams of protein. For those on a Keto diet, ground beef is a holy grail due to its high fat-to-protein ratio. If you are Gluten-Free, ensure your thickeners are cornstarch or arrowroot rather than flour.
The Fix-It: Common Pitfalls
- The Meat is Greying: Your pan wasn't hot enough or you overcrowded it. Fix: Remove the meat, drain the liquid, wipe the pan, and start again in smaller batches.
- The Sauce is Broken: If you see oil separating from the sauce, it has "broken." Fix: Add a tablespoon of hot water and whisk vigorously to re-emulsify.
- The Flavor is Flat: It likely lacks acidity. Fix: Add a squeeze of lemon juice or a teaspoon of vinegar to brighten the heavy fats.
Meal Prep Science:
When reheating ground beef, do it gently. High microwave heat causes the proteins to tighten and become rubbery. Instead, reheat in a skillet with a splash of broth to create steam, which rehydrates the meat and maintains that "day-one" quality.
The Wrap-Up:
Mastering the best ground beef recipes is a gateway to culinary confidence. By understanding the science of the sear and the importance of deglazing, you turn a simple dinner into a sophisticated feast. Remember, cooking is a blend of chemistry and intuition. Trust your senses, keep your tools sharp, and don't be afraid to let that skillet get screaming hot. You have the techniques; now go make something incredible!
The Kitchen Table:
How do I prevent ground beef from becoming tough?
Avoid overworking the meat before cooking and do not press down on it with a spatula. This preserves the internal fat pockets, ensuring the beef remains tender and juicy rather than dense and rubbery.
What is the best way to drain excess fat?
Carefully tilt your skillet and use a spoon to remove liquid fat into a heat-safe container. Never pour grease down the drain. Alternatively, use a crumpled paper towel held with tongs to blot the pan.
Can I cook ground beef straight from the freezer?
It is not recommended. For the best sear, the meat should be thawed and patted dry. Cooking frozen beef leads to uneven temperatures and excess moisture, which steams the meat instead of browning it.
How long does cooked ground beef last in the fridge?
Stored in an airtight container, cooked ground beef stays fresh for three to four days. For the best texture, ensure it has cooled completely before sealing to prevent condensation and sogginess.